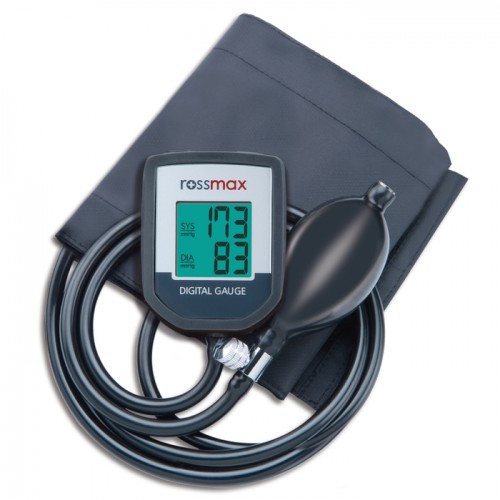
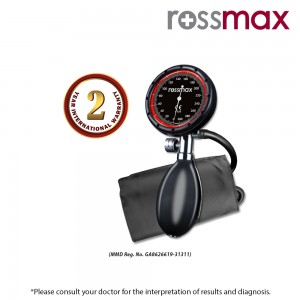
Rossmax SphygmomanoMeter GA102 Mandaus II
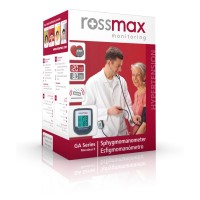
Rossmax patented Digital Sphygmomanometer always maintains calibration even if dropped. Spill proof design with backlight. 2 x AAA batteries provide up to 3,000 mesurements. The built-in alert feature allows to easy program calibration after 10,000 measurements.
- ESH Validated For Professional Clinic Use
- Extra Large Backlight LCD
- Shock & Splash Resistant
- Pulse Rate Display
- 360 Swivel Cuff Clip
- Virtually Indestructible Design
- Chrome Plated Brass
- 2x AAA Battery (About 3,000 Measurement)
- Without Stethoscope
- Built In Alert Feature (Program Calibration After 10,000 usage)
- Patent No: CN:ZL01259708.2; TW:488518; GE:20206337; JP:3089650; US: 717746
What's in the box
- Cuff
- Bulb
- Instruction manual
- Zipper bag
     | ||||
   |
![]()
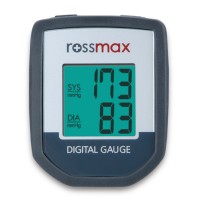
Different from other gauge, the Rossmax Digital Gauge’s marker feature ensures the accuracy during the measurement. The Digital Gauge is able to record the Korotkoff sound for measuring systolic / diastolic pressure and then the blood pressure would be displayed on LCD, reducing misdiagnosis resulted from time difference. The digital operation and display design clearly indicates the pressure, heartbeat and deflation rate on the same LCD display. The backlight screen design is convenient for users that need lighting. And the large, clear LCD display is also more user-friendly and is shock and water resistant for professional use.
Quick Guide
Applying the Cuff
![]()
- Plug the connector into the gauge and twist clockwise to secure the connection.
- Place the cuff over the bare upper arm, wrap it with the tube pointing your palm, and the artery mark over your main artery.
- The edge of the cuff should be at approximately 1.5 to 2.5 cm above the inner side of the elbow joint. If the index line falls within the range of the arm circumference indicator, the cuff circumference is suitable, otherwise you may need a cuff with a different circumference.
- Using the correct cuff size is important for an accurate reading.
- To stop operation at any time, open the air release valve, and the air in the cuff will be rapidly exhausted.
Measurement Procedures
![]()
- Place the stethoscope head over the main artery, underneath the artery mark of the cuff. (Fig. ①)
- Press the On/Off/Zeroing key. After zeroing, Mandaus II is ready to measure. (Fig. ②)
- With the valve closed, press the bulb and continue pumping to a value 30-40 mmHg above your normal blood pressure (Fig. ③). The back light will be turned on once the pressure is inflated over 30 mmHg, and throughout the measurement process.
- Open the valve to deflate the cuff gradually at a rate of 2-3 mmHg per second (The deflation rate is displayed on LCD) (Fig. ④).
- Press the Marker key to record the onset of Korotkoff sound as the systolic pressure, and press the Marker key again to record the disappearance of the Korotfkoff sound as diastolic pressure.
- After measurement is completed, fully open the valve to release any remaining air in the cuff. The heartbeat rate is displayed on the LCD. (Fig. ⑤)
Measurement Procedures
![]()
Here are a few helpful tips to help you obtain more accurate readings:
- Blood pressure changes with every heartbeat and is in constant fluctuation throughout the day.
- Blood pressure recording can be affected by the position of the user, his or her physiological condition and other factors. For greatest accuracy, wait one hour after exercising, bathing, eating, drinking beverages with alcohol or caffeine, or smoking to measure blood pressure.
- Before measurement, it’s suggested that you sit upright (90°) and quietly for at least 5 minutes as measurement taken during a relaxed state will have greater accuracy. You should not be physically tired or exhausted while taking a measurement. Make sure that the arm is same level with the heart when during take measurement in order to obtain more accurate readings.
- Do not take measurements if you are under stress or tension.
- During measurement, do not talk or move your arm or hand muscles.
- Take your blood pressure at normal body temperature. If you are feeling cold or hot, wait a while before taking a measurement.
- If the monitor is stored at very low temperature (near freezing), have it placed at a warm location for at least one hour before using it.
- Wait 5 minutes before taking the next measurement.
Remark: Please consult doctor for interpretation of results
| Specifications | |
| Color(s) | Black |
| Product Dimensions (cm) | 11.5 x 13.5 x 19.6 |
| Product Weight (kg) | 0.48 |
| Warranty | 2 Years |
| Shipping Details | |
| Availabillity | In Stock |
| Delivery Time | 10 - 15 Working Days |
| Shipping Dimension (cm) | 11.5 x 13.5 x 19.6 |
| Shipping Weight (kg) | 0.50 |

